Here's how...
Start with 2 sheets of 12x12 cardstock (I used white). Cut the following dimensions:
2 - 9 1/2" x 5 1/8"
1- 6 9/16" square
Step 1: Score the 2 pieces of 9 1/2" at 1/2" and 4 3/4" so you have a 1/2" section and 2- 4 1/2" sections.
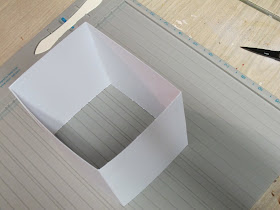
Step 2: Apply glue (I used double-sided tape) to the 1/2" section and glue it to the 4 1/2" section of your second piece of 9 1/2" x 5 1/8". Repeat. This will make a box.
Step 3: Score your 6 9/16" square 1" on each side.
Step 4: Using a cutting template (or tracing around the opening of the tissue box), cut an oval shape from the center of the 6 9/16" piece.
Step 5: Cut one side of the squares that were made when you scored the 9 1/16" piece. You will need the cuts to be able to fold this piece into the lid.
Step 6: Using some adhesive (I used an adhesive square), fold the cut square under to form the lid.
Step 7: Once you have made the lid, place it INSIDE the box you have created and apply adhesive so that it stays.
Step 8: DECORATE!!Your teacher will thank you!! And don't stop there...get started on Christmas or birthday presents. Who doesn't like a pretty tissue box? I even made one for my office!!
~Shannon
Products Used:
#1355 Preschool
#1359 3rd/4th Grade


wow wHAT A GREAT idea for a teacher..
ReplyDelete